 Drive Shaft Balancing Machine (DL)
The Hines Industries Model DL500 balancing machine is a computer based, dynamic, multi plane, manual load, single station, balancing machine configured for balancing drive shafts. The balance mechanism uses a rugged hard suspension, horizontal axis, rotating spindle to support the weight of the driveshaft and tooling. The base is concrete filled for stability and mass. The Hines Driveline is factory calibrated for high sensitivity precision balancing. Hines simplified computer setup displays readout on the first spin.
Balancing Instrumentation
The Hines Driveline computer turns your balancer into an information center allowing you to accurately balance a variety of driveshafts. The PC software is designed with touch screen use in mind. Large characters are displayed on a high-resolution Flat Panel display. The computer includes an industrial PC that is well suited to almost any environmental condition. It also includes a filter board and data acquisition board designed by Hines Industries. These boards allow the balancer to take precise measurements of the unbalance.
Industrial PC With Flat Panel Display
The standard PC specification includes:
- External USB port
- Touch screen inputs (calculator and keyboard)
- Easy switching between units (ounces to grams and inches to centimeters)
- Catalog to quickly load and save setups for different shaft types
- Adjustable tolerances. Screen displays “GOOD PART” in large bold text when the shaft is balanced to specification
Balance Reports
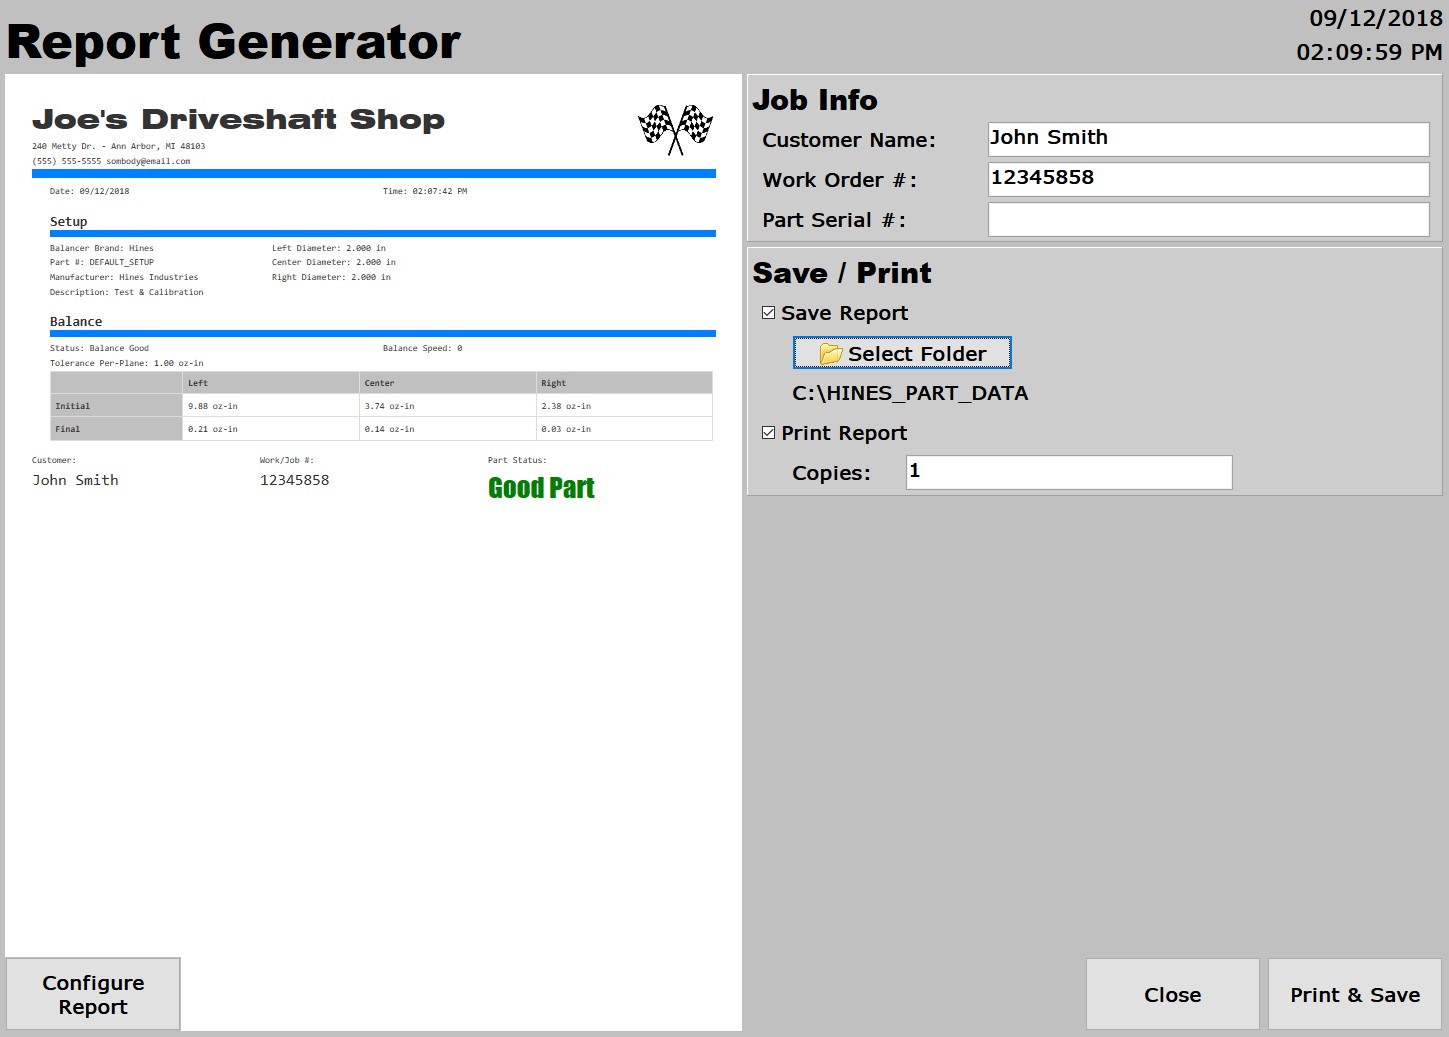
 Hines reporting software allows you to create customized reports that can be sent to customers. Reports can be generated for a single part or jobs. Customize your report with your company’s title, address, phone number, email, and company logo. This information only needs to be entered once. The operator can customize the font and color by setting these fields to the required choice. You are able to print and/or save the report. If printing, you are able to set the number of copies and see a print preview. If saving the report, you are able to select the location the report will be saved and then you can email your report to your customer.
Runout Sensors (optional)
It is critical to correct the runout before correcting unbalance. Reducing the runout in a driveshaft is crucial to achieving a smooth-running driveshaft. Hines has made this process fast, accurate and easy with two non-contact runout sensors. The computer then displays the amount and angle found at each sensor.
Tooling

Accuracy and repeatability of unbalance measurements is dependent on the ability of the tooling to center the part repeatedly on the balancing machine. For example, if a part weighs 100 pounds (1600 ounces), a centering error of 0.0001” will produce a balance measuring error of 1600 times 0.0001 or 0.16 ounce inches.
Two four jaw balancing chucks are included in the machine price. The Four-Jaw Chucks are manufactured and balanced to precision tolerances. They hold the driveshaft on its true centerline providing outstanding accuracy. These chucks hold either U-joints or reverse slip yokes so the operator can balance through series 1810 driveshafts without changing tooling.
Click here to see a Driveline in action


